

Saturday, December 11. 2021
Wildfly bootable jar inside the OpenShift sandbox
Today's entry is going to continue the bootable jar series that was started some time ago. Red Hat currently offers the Developer Sandbox for OpenShift as a preconfigured environment of its cloud product which you can use for training or learning purposes. The sandbox needs a free Red Hat login and also requests your phone number to avoid resources overexploiting. Throughout the entry the same application that was initially used for the bootable jar solution will be adapted for the sandbox or, more generically, for OpenShift. My starting point was this good article about the maven OpenShift plugin, it explains how to use maven to deploy a wildfly application to OpenShift. As usual the full process is going to be detailed step by step.
Preparation for the sandbox
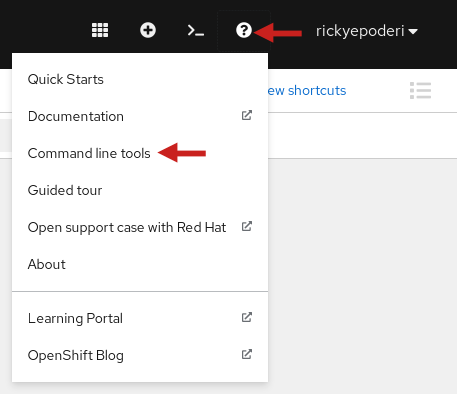
Once the sandbox is ready, log into the OpenShift console. The oc command tool needs to be downloaded and added to the system path. Click the question mark icon next to your login name and then the option Command line tools.
Download the command for your architecture, in my case the linux x86_64 option. Uncompress the file and put the oc binary in the path.
tar xvf oc.tar
mv oc ~/bin/
oc help
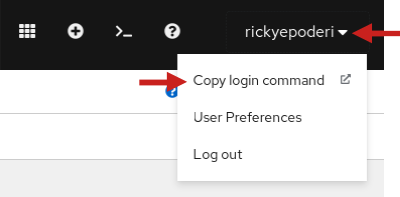
Now, again inside the console, click the option Copy login command and in the new page click on the DevSandbox button and then the Display Token Link. An oc login command is displayed that can be used to start working via terminal. That is more my style and now the command tool can also be used by the maven plugin.
oc login --token=xxx --server=https://api.sandbox-m2.xxxx.p1.openshiftapps.com:6443
oc whoami
rickyepoderi
oc project
Using project "rickyepoderi-dev" on server "https://api.sandbox-m2.xxxx.p1.openshiftapps.com:6443".
Keycloak/RH-SSO installation
The sample application was a jax-rs web services endpoint that used the keycloak plugin for security and swagger to document the API. So a keycloak server is needed in the deployment. As the sandbox is already provisioned with the Red Hat products the Red Hat Single Sign-On (RH-SSO, productivized version of the upstream keycloak project) can be directly installed.
There is a template called sso74-ocp4-x509-https which performs re-encryption to the https port and therefore no special certificates are needed for the configuration.
oc get templates -n openshift -o name | grep sso74-ocp4-x509-https
template.template.openshift.io/sso74-ocp4-x509-https
The server can be installed just passing the realm name and the admin username and password.
oc new-app --template=sso74-ocp4-x509-https -p SSO_REALM="ocp" -p SSO_ADMIN_USERNAME="admin" -p SSO_ADMIN_PASSWORD="xxxxx"
Wait the app to start and ask for the route used for the application. You can access the keycloak console in that https URL.
oc get route
NAME   HOST/PORT                                                        PATH   SERVICES   PORT    TERMINATION   WILDCARD
sso    sso-rickyepoderi-dev.apps.sandbox-m2.xxxx.p1.openshiftapps.com          sso        <all>   reencrypt     None
Preparing keycloak
The application will need several elements inside keycloak.
Once you are logged in the keycloak console, select the ocp realm and go to the roles tab.
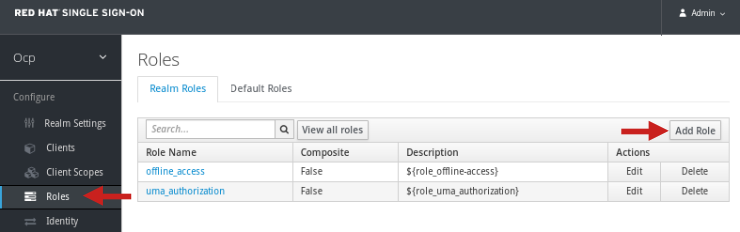
Click Add to create the Users role.

That role is required to call the hello application endpoint because an authorization filter was developed to check for it.
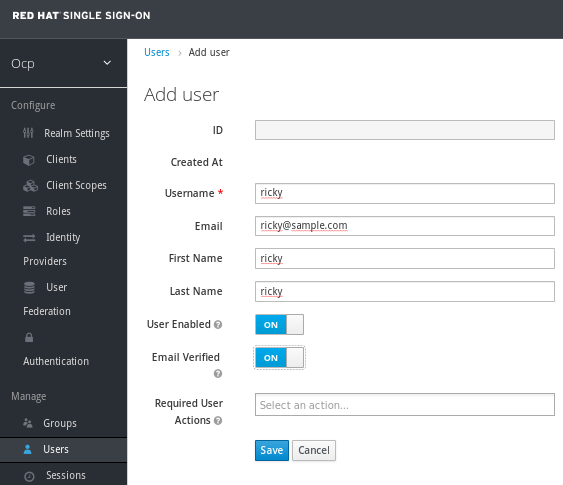
Now time to create the sample user. Go to the users tab.
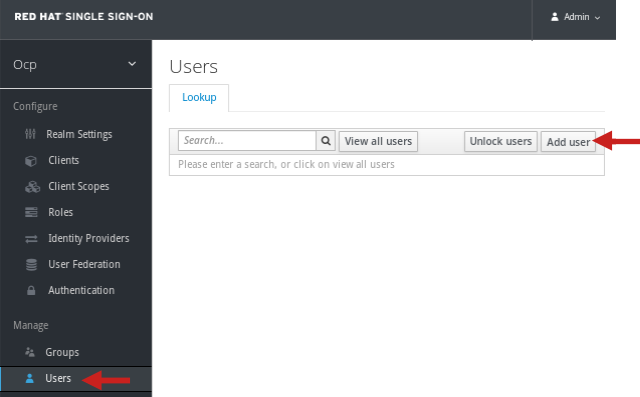
Fill the data for your user, in my case user ricky is created.
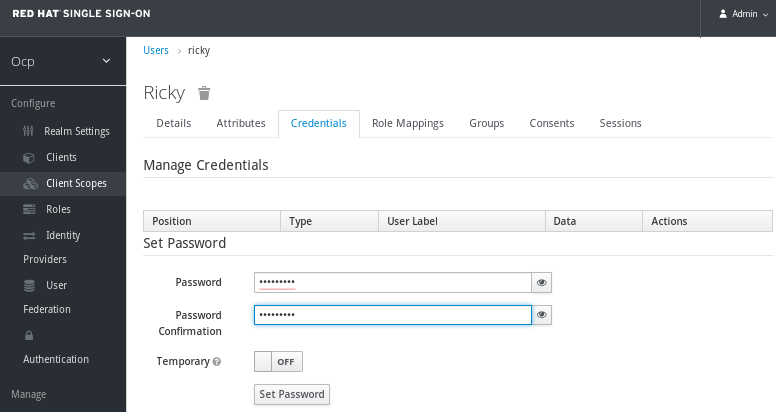
Set a password.
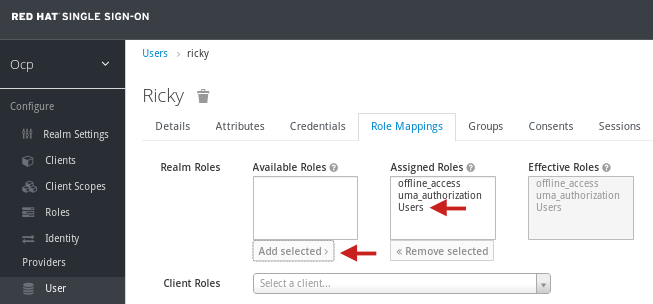
And assign the Users role to the created user.
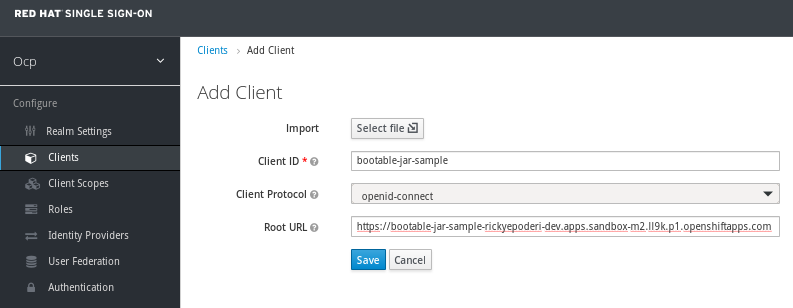
Finally go to the clients tab and create one for the application.
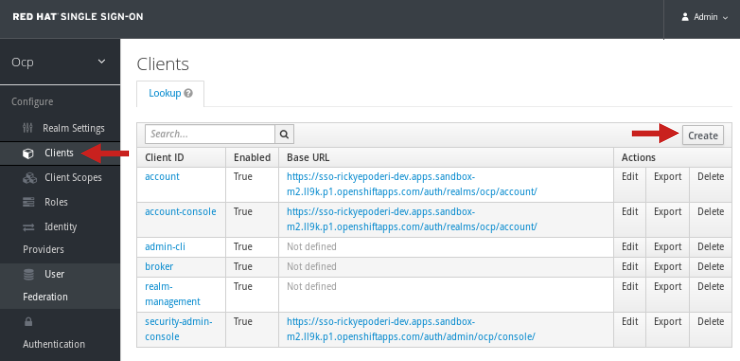
Just a public client is needed named bootable-jar-sample and with the correct URL in the sandbox (you can change it later if the URL is not correct).
Application changes
The application is already implemented, but it needs to be modified to be deployed in the cloud.
First the keycloak configuration files should be modified to point to the new realm and URL in the sandbox. If you remember there are two keycloak.json files (one for the JavaScript part and another one for the Java/REST application, I used that trick for the app before).
- src/main/webapp/WEB-INF/keycloak.json
- src/main/webapp/keycloak.json
In the index.html the keycloak adapter is updated to download the JS source file from the sandbox URL.
And finally the interesting part, the pom.xml. All the versions were updated to the last one available, among them wildfly to 25.0.1 and the keycloak plugin to 15.0.2. In order to deploy on OpenShift, adding the <cloud/> tag to the wildfly-jar-maven-plugin is a must. That tag prepares the deployment to be cloud aware (adds microprofile health layer for checks, configure KUBE_PING if using clustering, assigns the pod name to the jboss.node.name,...).
<plugin>
    <groupId>org.wildfly.plugins</groupId>
    <artifactId>wildfly-jar-maven-plugin</artifactId>
    <version>6.1.1.Final</version>
    <configuration>
        <feature-packs>
            <feature-pack>
                <location>wildfly@maven(org.jboss.universe:community-universe)#25.0.1.Final</location>
            </feature-pack>
            <feature-pack>
                <groupId>org.keycloak</groupId>
                <artifactId>keycloak-adapter-galleon-pack</artifactId>
                <version>15.0.2</version>
            </feature-pack>
        </feature-packs>
        <layers>
            <layer>base-server</layer>
            <layer>logging</layer>
            <layer>jaxrs</layer>
            <layer>keycloak-client-oidc</layer>
        </layers>
        <cloud/> <!-- Remember this!!! -->
    </configuration>
    <executions>
        <execution>
            <goals>
                <goal>package</goal>
            </goals>
        </execution>
    </executions>
</plugin>
Now the openshift-maven-plugin is needed to create the build image, all the required kubernetes resources and deploy everything to the sandbox. This plugin is the other important piece that needs to be added to your application. The following configuration will use a NodePort service, and the route is configured to default edge (OpenShift will expose https externally but the pods will internally use plain 8080 port) and Redirect (external http will be redirected to https).
<plugin>
    <groupId>org.eclipse.jkube</groupId>
    <artifactId>openshift-maven-plugin</artifactId>
    <version>1.5.1</version>
    <executions>
        <execution>
            <goals>
                <goal>resource</goal>
                <goal>build</goal>
            </goals>
        </execution>
    </executions>
    <configuration>
        <enricher>
            <config>
                <jkube-service>
                    <type>NodePort</type>
                </jkube-service>
                <jkube-openshift-route>
                    <generateRoute>true</generateRoute>
                    <tlsInsecureEdgeTerminationPolicy>Redirect</tlsInsecureEdgeTerminationPolicy>
                    <tlsTermination>edge</tlsTermination>
                </jkube-openshift-route>
            </config>
         </enricher>
    </configuration>
</plugin>
The only missing part is what image we start with, and that information is added using a global configuration property.
<properties>
    <jkube.generator.from>registry.redhat.io/ubi8/openjdk-11:latest</jkube.generator.from>
</properties>
In the end the real work is performed by this plugin. Once the bootable jar is ready the openshift-maven-plugin adds the bootable jar to a openjdk-11 base and creates the final image for the application. Besides it creates the service, the deployment-config and the route resources for kubernetes. All the elements that are needed to incorporate that image to the cloud.
At this point we are one maven command away of running the application inside the sandbox. Just execute the following.
mvn oc:deploy
Demo
It is just one command, but it does a lot of things: first it compiles the sources; bundles the app into a war; creates the bootable jar file; then the new OpenShift plugin constructs the image with the application and all the resources; finally everything is uploaded and deployed into the sandbox. The following video shows exactly that. OpenShift is initially only running the keycloak server inside it. The maven command is executed and all the steps are performed. After waiting the deploy to finish and the pod is fully started, the route is accessed. The browser is redirected to log in the keycloak realm. After that the hello endpoint is executed successfully.
Summary
Today's entry explains how to adapt the bootable jar idea and use it in an OpenShift environment. The two main points are adding the cloud tag to the wildfly-jar-maven-plugin (it prepares the bootable jar for OpenShift) and incorporating the openshift-maven-plugin (it performs all the interaction with the sandbox, creating the image and resources and deploying them). The first part is simple, the second one is not so easy. The OpenShift plugin has lots of options that can be tweaked. The post used the most common ones, the application is deployed and exposed using https in the new route. The complete maven project for the demo app can be downloaded from here. It can be used and/or extended to explore more complex scenarios.
Regards from the cloud!
Comments