

Saturday, November 30. 2019
SAML assertion replay in keycloak

Today's entry is again about keycloak but this time I am going to use the SAML protocol. This protocol is a very old web Single Sign On (SSO) protocol in which XML information is sent and signed between the peers. The entry is motivated because in the just released version 8.0.0 the SAML assertion can be retrieved from the logged principal and can be replayed. My idea was testing this feature using the assertion to call a CXF endpoint protected with Web Services Security (WSS). The endpoint will be configured to use the SAML assertion to validate the user. If you remember a previous series about CXF/WSS was presented in the blog, but using certificates instead of SAML.
As usual the entry summarizes the steps I followed to perform this PoC (Proof of Concept) in detail.
Download and install the keycloak server.
wget https://downloads.jboss.org/keycloak/8.0.0/keycloak-8.0.0.zip
unzip keycloak-8.0.0.zip
cd keycloak-8.0.0/bin
./standalone.sh
Go to the default location (http://localhost:8080) and create the initial admin user.
Now the server will be configured to use a self-signed certificate (secure https is a must for SAML). Create the server and trusted key-stores.
cd ../standalone/configuration
keytool -genkeypair -keystore keystore.jks -dname "CN=localhost, OU=test, O=test, L=test, C=test" -keypass XXXX -storepass XXXX -keyalg RSA -alias localhost -validity 10000 -ext SAN=dns:localhost,ip:127.0.0.1
keytool -export -keystore keystore.jks -alias localhost -file localhost.cer
keytool -import -trustcacerts -alias localhost -file localhost.cer -keystore cacerts -storepass changeit
Configure the server to use the previous certificate using the CLI interface:
cd ../../bin
./jboss-cli.sh --connect
/subsystem=elytron/key-store=localhost:add(type=jks, relative-to=jboss.server.config.dir, path=keystore.jks, credential-reference={clear-text=XXXX}
/subsystem=elytron/key-manager=localhost-manager:add(key-store=localhost, alias-filter=localhost, credential-reference={clear-text=XXXX})
/subsystem=elytron/server-ssl-context=localhost-context:add(key-manager=localhost-manager, protocols=["TLSv1.2"])
batch
/subsystem=undertow/server=default-server/https-listener=https:undefine-attribute(name=security-realm)
/subsystem=undertow/server=default-server/https-listener=https:write-attribute(name=ssl-context, value=localhost-context)
run-batch
We also configure the self-signed certificate as trusted for the whole JVM using a system property.
/system-property=javax.net.ssl.trustStore:add(value="${jboss.server.config.dir}/cacerts")Perform the same exact steps for wildfly (installation and certificate, use the same keystores, because both servers are going to run in the same localhost hostname). The wildfly server will be started with an offset of 10000.
./standalone.sh -Djboss.socket.binding.port-offset=10000At this point we have a keycloak server in 8443 and a wildfly server in 18443 port. Both use https and the same certificate. They also trust in each other. So now the keycloak-adapters for SAML should be installed in the wildfly server.
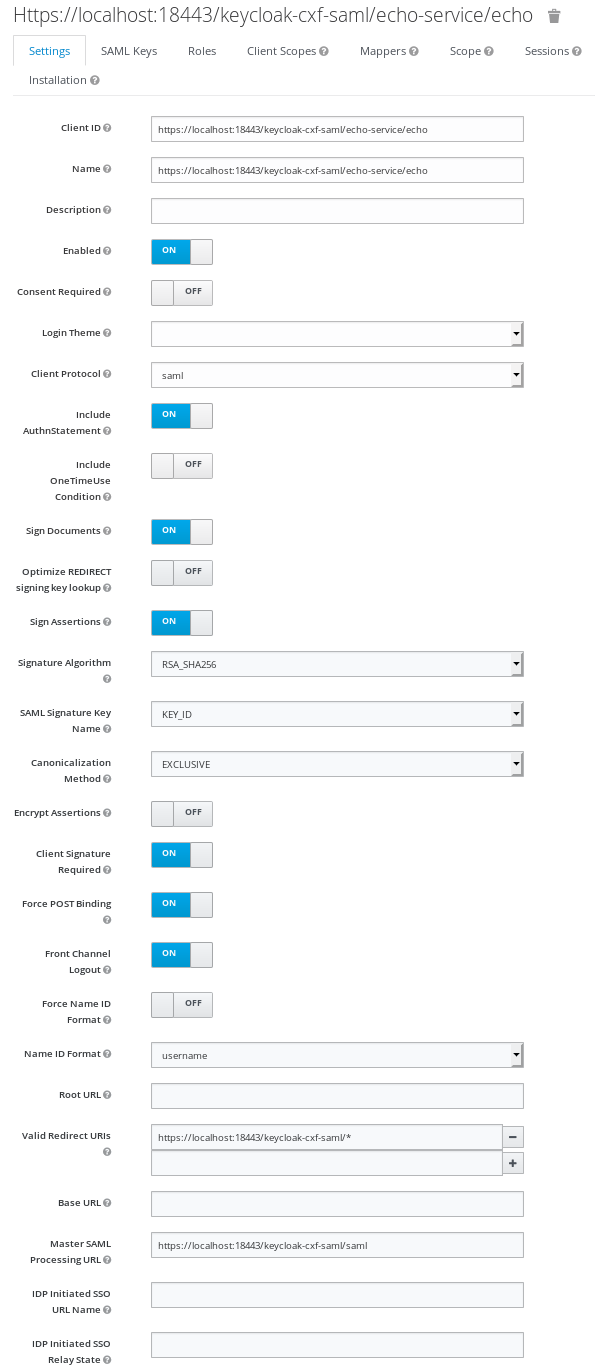
wget https://downloads.jboss.org/keycloak/8.0.0/adapters/saml/keycloak-saml-wildfly-adapter-dist-8.0.0.zip
cd ${WILDFLY_HOME}
unzip /path/to/keycloak-saml-wildfly-adapter-dist-8.0.0.zip
cd bin
./standalone.sh -Djboss.socket.binding.port-offset=10000
./jboss-cli.sh --connect controller=localhost:19990 --file=adapter-elytron-install-saml.cli
Now it is the time to configure the SAML client. The idea is simple, we will have a SAML protected application using the keycloak adapter. That application will call a CXF endpoint that will be configured to process the SAML assertion and validate the user. For simplicity I am going to use the same application (the web service endpoint will be located in the same app). Go to the keycloak console and select clients and create a new SAML client. The client ID should be the endpoint location https://localhost:18443/keycloak-cxf-saml/echo-service/echo (later I will explain this limitation). Check the option Sign Assertions to ON, this way the assertion is also signed and it can be replayed in a secure way. My client settings are presented below.
For the configuration of the CXF/wss4j endpoint, the realm certificate will be needed. So go to Realm Settings, select Keys tab and click on the Certificate button of the RSA key. Copy the certificate value and create a file server.cer with the typical certificate header and footer.
-----BEGIN CERTIFICATE-----
<copied certificate from keycloak console>
-----END CERTIFICATE-----
And finally import it into a JKS as a trusted certificate. This will be the store that should be configured later to validate SAML signatures by the web service endpoint.
keytool -import -trustcacerts -alias saml -file server.cer -keystore server.jks -storepass YYYYLet's start with the development. The first thing to do is configuring the keycloak SAML SSO. For that just obtain the initial template from the console. Go again to clients, select our client and click on tab Installation. Choose the option Keycloak SAML Adapter keycloak-saml.xml and a template configuration can be downloaded. This configuration should be placed in the file WEB-INF/keycloak-saml.xml inside the WAR application bundle. I customized the configuration file like below.
<keycloak-saml-adapter> <SP entityID="https://localhost:18443/keycloak-cxf-saml/echo-service/echo" sslPolicy="ALL" keepDOMAssertion="true" nameIDPolicyFormat="urn:oasis:names:tc:SAML:1.1:nameid-format:unspecified" logoutPage="/logout.jsp"> <Keys> <Key signing="true"> <PrivateKeyPem> MII... </PrivateKeyPem> <CertificatePem> MII... </CertificatePem> </Key> </Keys> <IDP entityID="idp" signatureAlgorithm="RSA_SHA256" signatureCanonicalizationMethod="http://www.w3.org/2001/10/xml-exc-c14n#"> <SingleSignOnService signRequest="true" validateResponseSignature="true" validateAssertionSignature="false" requestBinding="POST" bindingUrl="https://localhost:8443/auth/realms/master/protocol/saml"/> <SingleLogoutService signRequest="true" signResponse="true" validateRequestSignature="true" validateResponseSignature="true" requestBinding="POST" responseBinding="POST" postBindingUrl="https://localhost:8443/auth/realms/master/protocol/saml" redirectBindingUrl="https://localhost:8443/auth/realms/master/protocol/saml"/> </IDP> </SP> </keycloak-saml-adapter>The web.xml is configured to protect the application but not the endpoint. The CXF web service is secured via wss4j, so no web security should be applied to it.
<?xml version="1.0" encoding="UTF-8"?>
<web-app xmlns="http://xmlns.jcp.org/xml/ns/javaee"
         xmlns:xsi="http://www.w3.org/2001/XMLSchema-instance"
         xsi:schemaLocation="http://xmlns.jcp.org/xml/ns/javaee http://xmlns.jcp.org/xml/ns/javaee/web-app_3_1.xsd"
         version="3.1">
    <welcome-file-list>
        <welcome-file>index.jsp</welcome-file>
    </welcome-file-list>
    <security-constraint>
        <web-resource-collection>
            <web-resource-name>Protect all application</web-resource-name>
            <url-pattern>/*</url-pattern>
        </web-resource-collection>
        <auth-constraint>
            <role-name>*</role-name>
        </auth-constraint>
        <user-data-constraint>
            <transport-guarantee>CONFIDENTIAL</transport-guarantee>
        </user-data-constraint>
    </security-constraint>
        <security-constraint>
        <web-resource-collection>
            <web-resource-name>The WS endpoint is public</web-resource-name>
            <url-pattern>/echo-service/*</url-pattern>
        </web-resource-collection>
        <user-data-constraint>
            <transport-guarantee>CONFIDENTIAL</transport-guarantee>
        </user-data-constraint>
    </security-constraint>
    <login-config>
        <auth-method>KEYCLOAK-SAML</auth-method>
        <realm-name>this is ignored currently</realm-name>
    </login-config>
    <security-role>
        <description>Role required to log in to the Application</description>
        <role-name>*</role-name>
    </security-role>
    <session-config>
        <session-timeout>30</session-timeout>
    </session-config>
</web-app>
The application is configuring the KEYCLOAK login to use the SSO. The full application (/*) is protected, but the WS endpoint (/echo-service/*) is excluded (everyone can access the endpoint at web level). Besides any authenticated user can access the application (role *) and secure communication (https) is compulsory (transport is defined as confidential).
Time to create the web service endpoint. This part is very similar to the previous entry about WSS and certificates that I commented at the beginning. So you can review it for more information about this subject, because it is really a bit complicated. The simple echo web service is developed like this.
@Stateless
@WebService(name = "echo",
        targetNamespace = "http://es.rickyepoderi.sample/ws",
        serviceName = "echo-service")
@Policy(placement = Policy.Placement.BINDING, uri = "WssSamlV20Token11.xml")
@SOAPBinding(style = SOAPBinding.Style.RPC)
@EndpointConfig(configFile = "WEB-INF/jaxws-endpoint-config.xml", configName = "Custom WS-Security Endpoint")
public class Echo {

    @WebMethod
    public String echo(String input) {
        Message message = PhaseInterceptorChain.getCurrentMessage();
        SecurityContext context = message.get(SecurityContext.class);
        Principal caller = null;
        if (context != null) {
            caller = context.getUserPrincipal();
        }
        return (caller == null? "null" : caller.getName()) + " -> " +  input;
    }
}
The endpoint is just an echo service but it obtains the user from CXF. If you check it, the web service is configured with a specific WSS policy WssSamlV20Token11.xml file and a configuration file WEB-INF/jaxws-endpoint-config.xml. The next points deal with those files.
- The most complicated part is creating the policy to request a SAML assertion for the web service. For that I checked some of the CXF tests in order to obtain samples of SAML policies and, finally, the following WssSamlV20Token11.xml file is used.
<?xml version="1.0" encoding="UTF-8" ?>
<wsp:Policy wsu:Id="SecurityPolicy"
            xmlns:wsp="http://www.w3.org/ns/ws-policy"
            xmlns:wsu="http://docs.oasis-open.org/wss/2004/01/oasis-200401-wss-wssecurity-utility-1.0.xsd"
            xmlns:sp="http://schemas.xmlsoap.org/ws/2005/07/securitypolicy">
    <wsp:ExactlyOne>
        <wsp:All>
            <sp:TransportBinding>
                <wsp:Policy>
                    <sp:TransportToken>
                        <wsp:Policy>
                            <sp:HttpsToken>
                                <wsp:Policy/>
                            </sp:HttpsToken>
                        </wsp:Policy>
                    </sp:TransportToken>
                    <sp:Layout>
                        <wsp:Policy>
                            <sp:Lax/>
                        </wsp:Policy>
                    </sp:Layout>
                    <sp:AlgorithmSuite>
                        <wsp:Policy>
                            <sp:Basic256/>
                        </wsp:Policy>
                    </sp:AlgorithmSuite>
                </wsp:Policy>
            </sp:TransportBinding>
            <sp:SupportingTokens>
                <wsp:Policy>
                    <sp:SamlToken sp:IncludeToken="http://schemas.xmlsoap.org/ws/2005/07/securitypolicy/IncludeToken/AlwaysToRecipient">
                        <wsp:Policy>
                            <sp:WssSamlV20Token11/>
                        </wsp:Policy>
                    </sp:SamlToken>
                </wsp:Policy>
            </sp:SupportingTokens>
        </wsp:All>
    </wsp:ExactlyOne>
</wsp:Policy>
The policy is requesting https protocol and a SAML version 2.0 token. I know this part is horribly complicated but this is WSS security, not an easy world.
In order to configure the validation of the assertion the file jaxws-endpoint-config.xml is provided.
<?xml version="1.0" encoding="UTF-8"?>
<jaxws-config xmlns="urn:jboss:jbossws-jaxws-config:4.0"
              xmlns:xsi="http://www.w3.org/2001/XMLSchema-instance"
              xmlns:javaee="http://java.sun.com/xml/ns/javaee"
              xsi:schemaLocation="urn:jboss:jbossws-jaxws-config:4.0 schema/jbossws-jaxws-config_4_0.xsd">
  <endpoint-config>
    <config-name>Custom WS-Security Endpoint</config-name>
    <property>
      <property-name>ws-security.signature.properties</property-name>
      <property-value>server.properties</property-value>
    </property>
  </endpoint-config>
</jaxws-config>
The server.properties contains the properties to access the keystore to validate the signature of the SAML assertion.
org.apache.wss4j.crypto.provider=org.apache.ws.security.components.crypto.Merlin
org.apache.wss4j.crypto.merlin.keystore.type=jks
org.apache.wss4j.crypto.merlin.keystore.password=YYYY
org.apache.wss4j.crypto.merlin.keystore.file=server.jks
And that server.jks is just the previous keystore created in step 8 using the keycloak certificate in the realm. So, in summary, the endpoint is configured to request a SAML token and the certificate used by keycloak is configured as trusted for the validation. This way the wss4j implementation can check the SAML assertion received and validate its signature. If everything is OK the user will be recovered by the echo service and returned.
- And here it comes the final part. How is the SAML assertion retrieved and used to call the endpoint? For that I created a simple EchoServlet that gets the assertion from the special keycloak principal and calls the endpoint.
            WSClient client = new WSClient(request);
            out.println(client.callEcho(((SamlPrincipal) request.getUserPrincipal()).getAssertionDocument(), input));
The actual code in the servlet is bit more complicated because I decided to check the validity of the assertion. The SAML assertion usually has some time constraints to not use the same assertion forever. If the assertion is expired the application forces a re-login of the user. But I decided to not add here the details to not complicate even more the explanation.
The CXF implementation for saml uses a callback handler that should provide the assertion to be sent by the client (the handler fills a SAMLCallback with the assertion). In this case it is extremely easy because it is just there inside the principal. So I created KeycloakSamlCallbackHandler that just wraps the assertion to give it to the CXF system in order to attach it to the SOAP message.
public class KeycloakSamlCallbackHandler implements CallbackHandler {

    Document assertion;

    public KeycloakSamlCallbackHandler(Document assertion) {
        this.assertion = assertion;
    }

    @Override
    public void handle(Callback[] callbacks) throws IOException, UnsupportedCallbackException {
        if (callbacks != null) {
            for (Callback callback1 : callbacks) {
                if (callback1 instanceof SAMLCallback) {
                    SAMLCallback callback = (SAMLCallback) callback1;
                    callback.setAssertionElement(assertion.getDocumentElement());
                }
            }
        }
    }
}
And the WSClient just puts the callback to the call context. This way the CXF implementation can retrieve the SAML assertion and add it to the SOAP message.
    public String callEcho(Document assertion, String input) {
        EchoService service = new EchoService(url);
        Echo echo = service.getEchoPort();
        // Properties for WS-Security configuration
        ((BindingProvider)echo).getRequestContext().put(SecurityConstants.SAML_CALLBACK_HANDLER,
                new KeycloakSamlCallbackHandler(assertion));
        // call the endpoint
        return echo.echo(input);
    }
Here it is important to add the option keepDOMAssertion to true, because this way the DOM document of the original assertion is stored in the SAML principal and can be recovered by the application to replay it. More information about the SAML configuration for adapters in the keycloak documentation
And that is all. Very long and complicated setup, but it shows that you can replay a SAML assertion. I decided to use CXF/wss4j because it is another complete different SAML implementation (it uses opensaml internally). Here it is a video that shows that it really works. When I access the application the browser is redirected to the keycloak login page. The typical SAML dance is accomplished and finally the browser accesses the application index. The remote user, roles and even the assertion are presented. Check that the assertion is signed and it has some restrictions (time and audience constraints). When the web service is called, the echo works and the message is returned with the user correctly identified by the CXF implementation.
But there are some issues here. At least two new features are needed in order to have a proper assertion replay. The first problem is the time restrictions that I commented before. In keycloak the different times are obtained from the Realm Settings, inside the Tokens tab. The lifespans used are Access Token Lifespan and Client login timeout (the SSO Session Max is also used but this one is very long by default and therefore it is not problematic). Those two times are usually very short (one minute) because of OIDC, and they are too short for SAML. So if you really need to use the assertion replay those values need to be increased to cover your needs. The real problem is that SAML clients cannot override the realm settings (OIDC ones can define a specific access token lifespan).
The second issue is the audience. A SAML assertion can also define which endpoints are allowed to use it. This is done by the audience tag (a list of URLs that are allowed to consume the assertion). By default the keycloak server constructs the assertion with the audience limited to the client ID (only that client can use this assertion). This fact is absolutely limitating the assertion replay. If you remember in step 7 the client was created with a specific ID, which is exactly the URL of the echo endpoint. That was a very nasty trick. This makes both (app and CXF endpoint) use the same ID and both pass the audience validation. But obviously if you want to send the assertion to a second endpoint it would fail, the implementation would check the audience constraint and would complain that its own URL is not in the list. Maybe CXF/wss4j can be configured to not check the audience but that is weird, audience is there for a reason.
Therefore I filed two new feature requests for keycloak (JIRA 12000 and 12001) and I am working on them. There is room for other improvements here but, at least, with those two new settings the assertion replay can be used. You can download the full maven project for the PoC application from here.
Best regards!
Thanks for the replay example and the addition of custom audiences to keycloak. It was dearly missed! I did notice that up to version 9.0.0 audiences could contain url's. Since version 9.0.2 colons and slashes are no longer allowed. This means one has to go back using the webservice url as name of the client. Is there a deeper meaning for preventing urls to be entered as custom audience?
Thanks
It seems to be issue: https://issues.redhat.com/browse/KEYCLOAK-13635
It's just an UI issue, the functionality behind is OK. It's already fixed and marked for inclusion in 9.0.4. If you are in a hurry try to update the mapper using curl instead of the console.
Thanks, didn't think of that. That should work.
Regards
Honoré
I modified the kc-provider-config.html. That didn't solve it. I've no idea why (I did restart). I ended up editing the apps.js file and removing the colon and slash from keypressed.match[...] in the module.directive('kcNoReservedChars',...). It might not be ideal, but it worked. Thanks for the pointer to the PR!
Regards
Honoré
Comments