

Saturday, January 17. 2015
Implementing a Jersey 2 Application with Maven
During the past weeks I had to implement some quick examples using RESTful web services in Java. I decided to use the jersey 2 implementation and I started to develop the examples as I always have done, using netbeans and downloading all the needed jars. Quickly I realized that jersey uses a lot of dependencies and that working in my old fashion way was a complete hell. But you cannot teach an old dog new tricks, and, because I was in a hurry, I just fought again and again with the ClassNotFoundException until the application worked. At least I understand that my behavior was not the proper way to go and I had to start working with maven in this kind of projects. I have to say that I usually use maven with important projects but not for my little tests or sample applications.
This entry is going to explain how easy (and what a fool I was) it is to use maven to integrate jersey 2 inside your projects. The entry is going to develop a simple jersey application in order to use xml and json to return some simple hello world examples. The application will run inside a tomcat 8 container (no jersey implementation provided by the server). As it is usual in the blog it is going to be detailed step by step.
First the maven project is going to be created, the only important idea is to create a webapp style project.
$ mvn archetype:generate -DgroupId=es.rickyepoderi.sample-jersey2 -DartifactId=sample-jersey2 -DarchetypeArtifactId=maven-archetype-webapp -DinteractiveMode=false
This command creates an empty project called sample-jersey2 with default web.xml file and welcome index.jsp.
I decided to change the web.xml cos it was very old (tomcat 8 supports servlet 3.1 specification) and it can be renewed.
$ cat src/main/webapp/WEB-INF/web.xml
<?xml version="1.0" encoding="UTF-8"?>
<web-app xmlns="http://xmlns.jcp.org/xml/ns/javaee"
         xmlns:xsi="http://www.w3.org/2001/XMLSchema-instance"
         xsi:schemaLocation="http://xmlns.jcp.org/xml/ns/javaee http://xmlns.jcp.org/xml/ns/javaee/web-app_3_1.xsd"
         version="3.1">
  <display-name>sample-jersey2</display-name>
</web-app>
Once the project is setup the sources directory is created.
mkdir src/main/webapp/java
mkdir -p src/main/java/es/rickyepoderi/samplejersey2
And now the project can be opened using NetBeans with no problem. When I work with maven projects I use NetBeans only for developing (writing the code), and modifying maven configuration (editing pom.xml file), compilation and deployment is done using the command line.
Following jersey documentation it is extremely easy to include inside the pom.xml file the dependencies for jersey core.
    <dependency>
      <groupId>org.glassfish.jersey.containers</groupId>
      <artifactId>jersey-container-servlet</artifactId>
      <version>2.14</version>
    </dependency>
As tomcat does not include jersey by default the JARs should be packed inside the deployment file (default compile scope). After adding jersey dependencies, the project can be packaged inside a WAR and all the needed libraries will be in the WEB-INF/lib directory.
$ mvn package
At this point a little jersey application is developed, it just consists in a little application exposed in the /ws path.
@ApplicationPath("/ws")
public class Application extends ResourceConfig {

    public Application() {
        packages(this.getClass().getPackage().getName());
    }

}
In jersey 2 if the container is Servlet 3.0 compliant no web.xml information is needed, the classes will be checked, the ApplicationPath annotation will be found and the REST app will be setup correctly. Now I prepared a simple jaxb class HelloResponse to return the typical hello string.
@XmlRootElement(name = "hello-response")
public final class HelloResponse {

    static public final int SUCCESS = 0;
    static public final int ERROR = 1;
    static public final String DEFAULT_NAME = "world";

    private int status;
    private String error;
    private String name;

    public HelloResponse() {
        this.status = SUCCESS;
        this.error = null;
        this.name = DEFAULT_NAME;
    }

    public HelloResponse(String name) {
        this();
        this.setName(name);
    }

    public HelloResponse(int status, String error) {
        this();
        this.status = status;
        this.error = error;
    }

    public int getStatus() {
        return status;
    }

    public void setStatus(int status) {
        this.status = status;
    }

    public String getError() {
        return error;
    }

    public void setError(String error) {
        this.error = error;
    }

    public String getName() {
        return name;
    }

    public void setName(String name) {
        if (name != null && !name.isEmpty()) {
            this.name = name;
        } else {
            this.name = DEFAULT_NAME;
        }
    }

    @Override
    public String toString() {
        return "hello " + name + "!!!";
    }
}
And finally the web services endpoint is created. The class HelloWS has three methods to return the same message but using plain text, xml and json.
@Path("/hello") public class HelloWS { private HelloResponse sayHello(String name) { return new HelloResponse(name); } @GET @Path("/text/{name}") @Produces(MediaType.TEXT_PLAIN) public String world(@PathParam("name") String name) { return sayHello(name).toString(); } @GET @Path("/xml/{name}") @Produces(MediaType.APPLICATION_XML) public HelloResponse xmlWorld(@PathParam("name") String name) { return sayHello(name); } @GET @Path("/json/{name}") @Produces(MediaType.APPLICATION_JSON) public HelloResponse jsonWorld(@PathParam("name") String name) { return sayHello(name); } }As it is explained in the jersey documentation, the JSON support comes as a set of extensions that can be added to your application. Besides jersey provides integration for three different JSON implementations: jettison, jackson and moxy. And, as I have experienced, the integration with each one is as simple as the integration of the jersey itself.
Jettison. In order to add support for the old jettison implementation, the dependency should be added to the pom.xml configuration file.
    <dependency>
      <groupId>org.glassfish.jersey.media</groupId>
      <artifactId>jersey-media-json-jettison</artifactId>
      <version>2.14</version>
    </dependency>
Jersey provides an integration library for each media implementation, that library should always be added to your project. The only modification in the application code is configuring to your application the jettison feature.
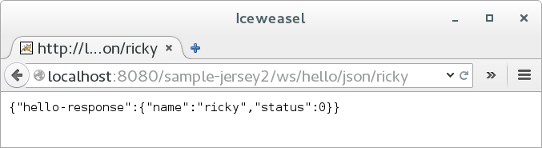
    public Application() {
        register(JettisonFeature.class);
        packages(this.getClass().getPackage().getName());
    }
Only with this two little points, packaging and deploying again, the application supports json using jettison to construct the response object.
Jackson. In order to use the new implementation from codehouse the same two steps should be done, changing the dependency from jettison to jackson media.
    <dependency>
      <groupId>org.glassfish.jersey.media</groupId>
      <artifactId>jersey-media-json-jackson</artifactId>
      <version>2.14</version>
    </dependency>
And adding the corresponding feature.
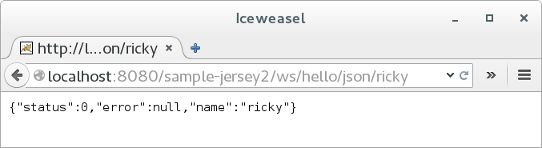
    public Application() {
        register(JacksonFeature.class);
        packages(this.getClass().getPackage().getName());
    }
Now the method returns the json but using jackson.
Moxy. The moxy implementation provided by eclipse is the default json media in jersey. For that reason, in this case, no feature is needed (just adding the needed libraries is enough).
    <dependency>
      <groupId>org.glassfish.jersey.media</groupId>
      <artifactId>jersey-media-moxy</artifactId>
      <version>2.14</version>
    </dependency>
In this case the application is not modified and the json data is returned.

As you have seen, the three json implementations provide three different data (jettison adds the root element, jackson returns the null error element and moxy just returns the two non-null elements without root element). This is a characteristic of JSON I do not like too much, it is too generic and open. Maybe there are specific options for each implementation to fine-tune the marshalling (jersey supports constructing your own JAXBContext using a ContextResolver<JAXBContext>, this way the jaxb context can be initialized with any specific property that the application needs).
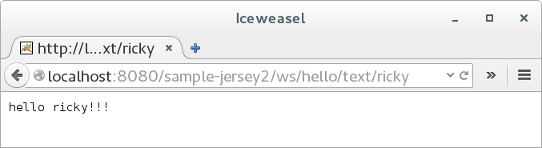
At this point the application can be packaged with maven and the resulting war file is deployed inside the tomcat 8 container. The first two methods will work flawlessly. Here it is the output for the first text method.
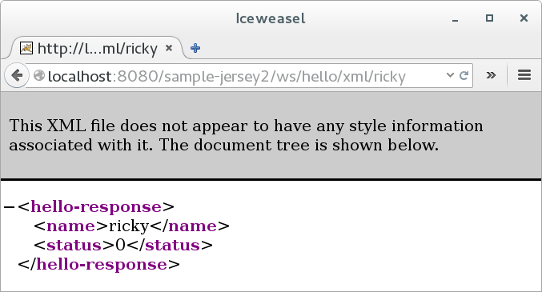
And the same for the XML method.
But the JSON method fails (jaxb provides XML by default inside the JavaSE, but does not provide any implementation for JSON) with the following error in the log: "MessageBodyWriter not found for media type=application/json, type=class es.rickyepoderi.samplejersey2.HelloResponse, genericType=class es.rickyepoderi.samplejersey2.HelloResponse".
And that is all. Easy and simple. It is incredible that I spent several hours in order to have the correct environment for a jersey application. As you can see, if maven is used all the dependencies are setup in a question of seconds. At that time I realized that this was the proper way to start, but I decided to continue doing as I always had done it before (just because I am used to do it that way). But no more, now it is painfully clear that maven is the correct choice when you face projects with complex dependencies. It is easy and incredible fast. As I was performing the steps described in the entry I was feeling more and more stupid, unfortunately, these things happen to me too often. You can download the maven project from here.
{ "regards": "best" }
Comments